DHT22 temperature and humidity sensor
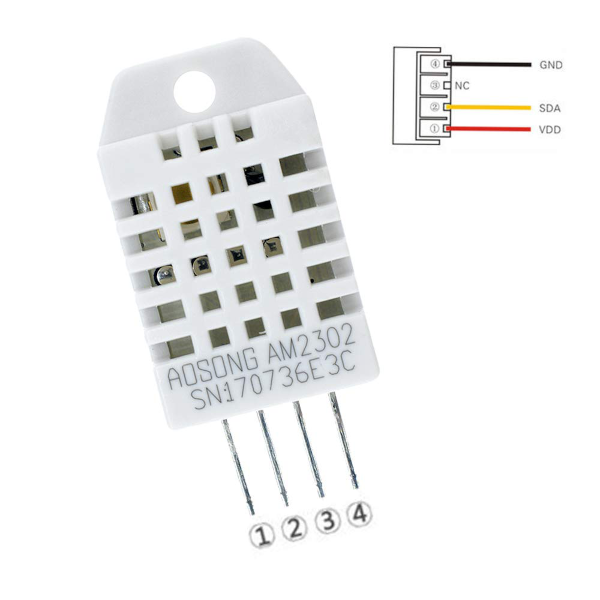 Figure 1: DHT22 temperature and humidity sensor
The DHT22 combined temperature and relative humidity sensor provides a simple and low-cost solution.
To differentiate between the two readings, the DHT22 makes use of a simple protocol on a single data pin which is best interpreted by using existing library code. The instructions below show how to connect the DHT22 up to your Particle Argon, and take you through the process of finding and including the right library in your application code using the Web IDE.
This example is based on the Adafruit version that is provided with the library code, and the Photon Maker Kit tutorial linked in the box above.
First, set up the hardware connections as shown in Figure 2:
[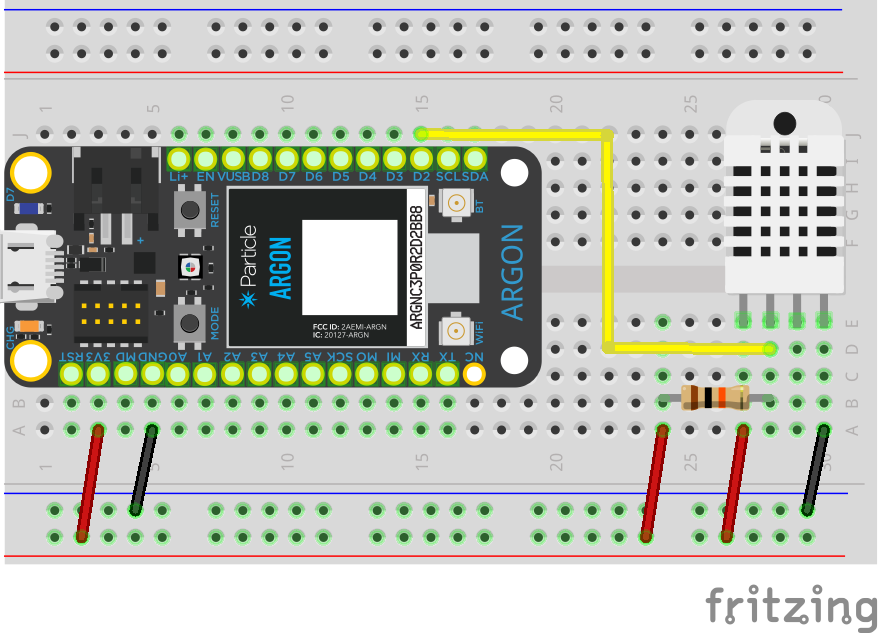 Figure 2: Breadboard layout
Next, go to the Particle Web IDE and paste the code below into the editor.
Give your file a name and save it using the folder icon in the navigation panel.
1 2 3 4 5 6 7 8 9 10 11 12 13 14 15 16 17 18 19 20 21 22 23 24 25 26 27 28 29 30 31 32 33 34 35 36 37 38 39 40 41 42 43 44 45 46 47 48 49 50 51 52 53 54 55 56 | |
Now click on the Libraries icon in the navigation panel and search for dht as shown in Figure 3.
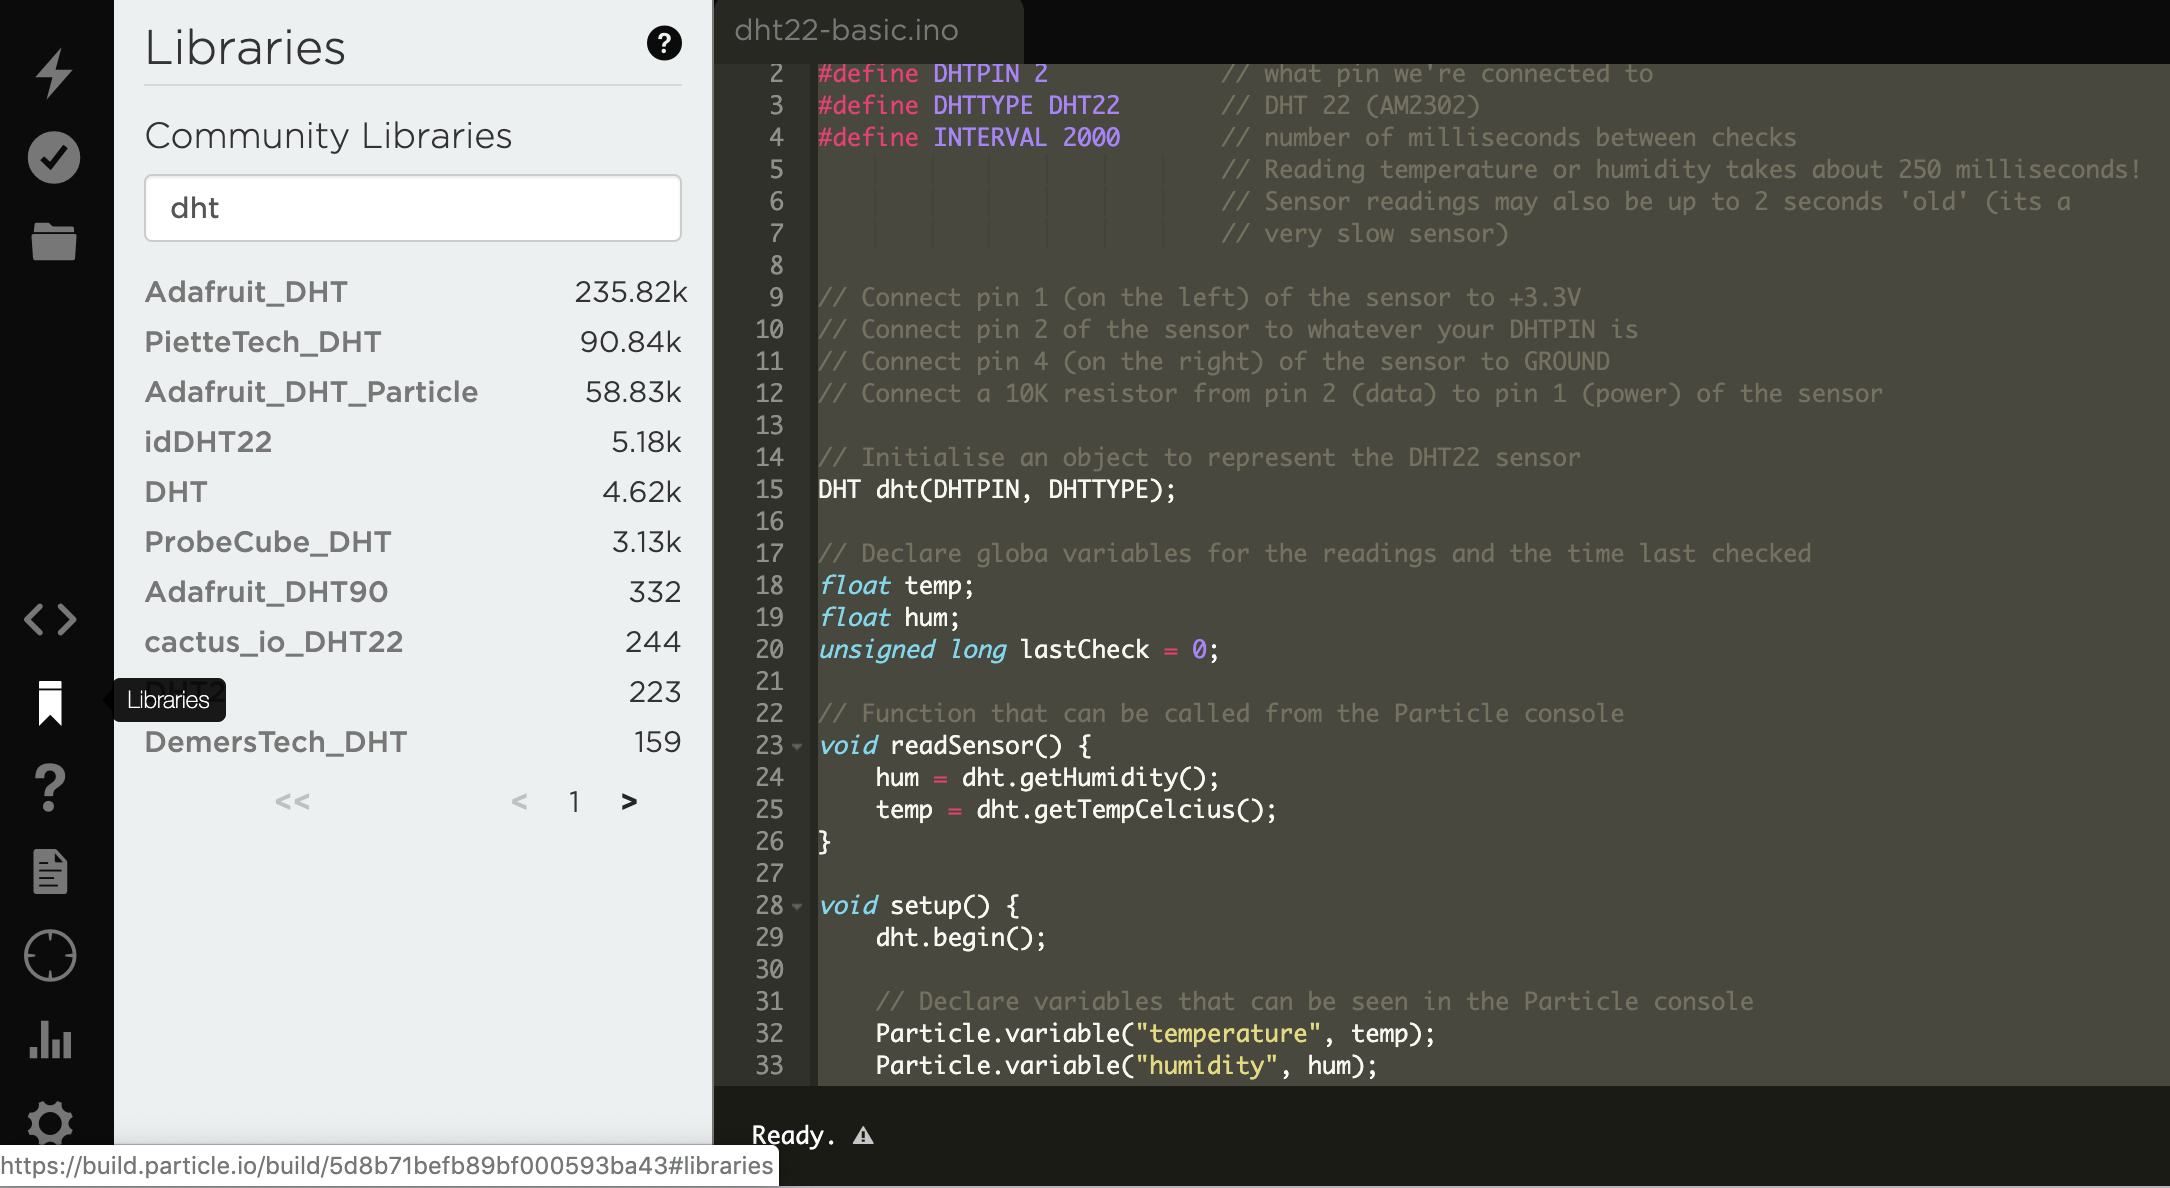 Figure 3: DHT library
Choose the library called Adafruit_DHT. This will display the
library - click the button labelled Include in project.
In the next step of the process, select your file from the ones displayed and click Confirm when prompted.
Flash the code to your device, and then go to the Particle console.
You should see events being published every ten seconds, and in addition,
you should be able to get the values of the two variables declared in the
code and call the readSensor() function to generate ad-hoc
events.