Google Cloud Platform
The Particle device cloud integrates with Google's cloud platform. This provides an easy method for aggregating and manipulating your IoT data.
Overview
While the Particle hardware and software products and services are tightly integrated, general cloud service providers like Google, Amazon and Microsoft offer hundreds of individual services in many categories. Making the strategic decisions about which services to use is therefore a significant stage in the design of a cloud-based application.
Since our focus is on the overall architecture of IoT system, the minutiae of differentiating between cloud service from a single provider or from different providers is of no great interest at this stage. Instead, the overall architecture shown below has already been selected.
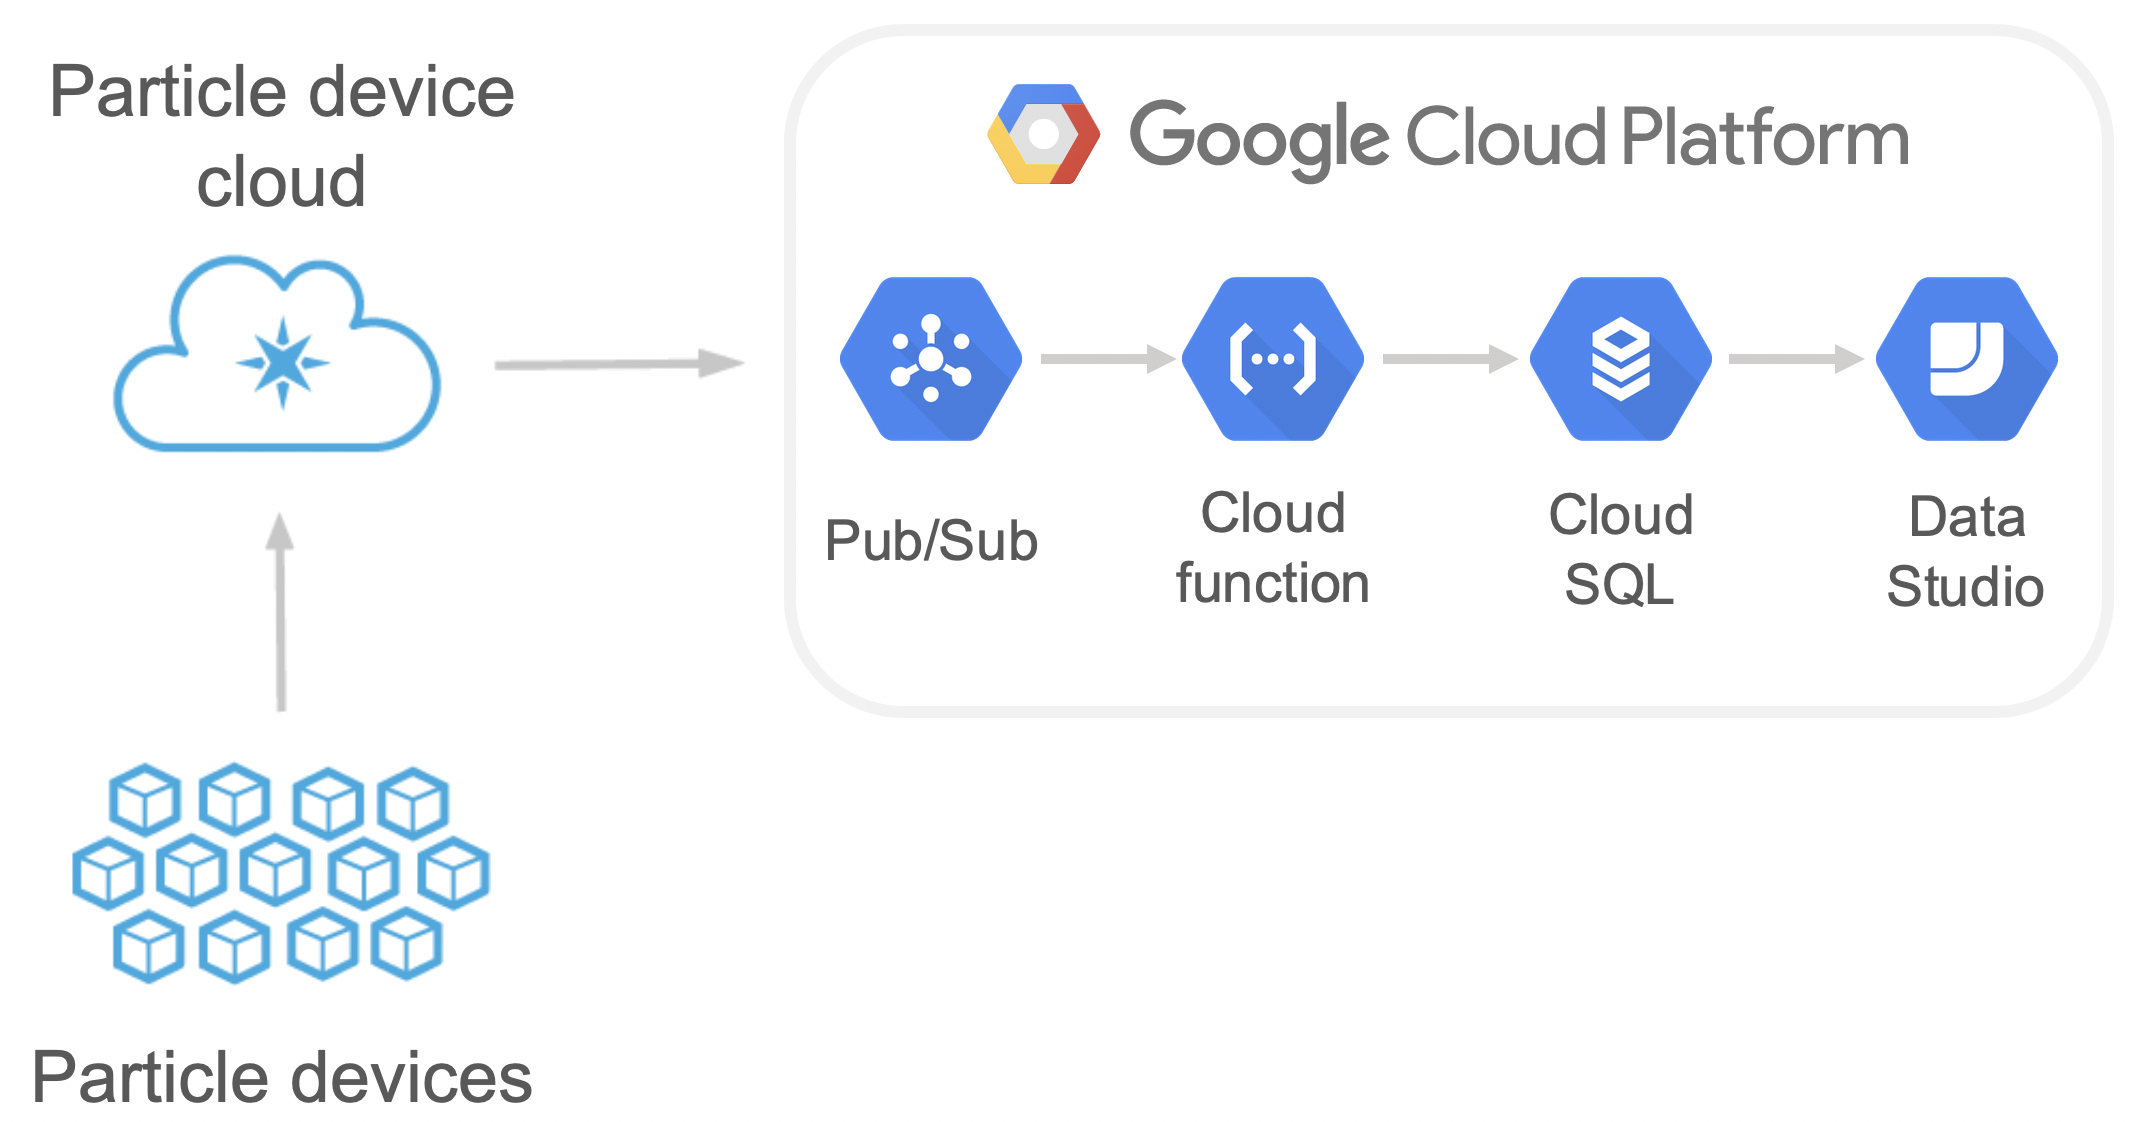
Each of the major elements shown in the diagram will require explicit attention to set up. The steps below will guide you through the process using existing material where possible. Try to build up some familiarity with the way that the Particle and Google documentation is structured. This will make it easier to navigate around the huge sets of documents available and will make it easier over time to find the information you need.
A further strategic decision that is assumed in these instructions is that we will be using Python as our main development language where possible.
Step 1: Particle tutorial
The Particle Web site provides detailed instructions for setting up a free Google Cloud Platform (GCP) account and for configuring the two environments to communicate with each other. Follow the instructions provided, but stop when you get to Confirming the data reaches the Google Cloud Platform. At that point, you should move on to step 2 below.
Step 2: Confirm that the integration is working
Go to the integrations section in the Particle console, select the GCP integration and scroll down the page to the Logs section. Here, you should see a chart of the messages successfully sent to GCP.
Since sending is not the same as receiving, you should also check the messages at the GCP end. To do that, open your Pub/Sub topic and check that the Publish message count and Publish bytes charts show the expected activity.
Step 3: Create a Cloud Function
A cloud function is a piece of code that is hosted on GCP. It has a very specific purpose, can be triggered in different ways and produces a predictable result. This is the mechanism we will use to save the data from our Particle device in a cloud database.
In this first step, we will just create a placeholder function which does not actually interact with a database yet. After the database has been created, we will return to the cloud function and add the database operations.
The GCP Web site provides instructions on how to set up a cloud function which is triggered by a Publish event in a Pub/Sub topic. However, the tutorial expects you to use the GCP command-line interpreter (CLI). This is not necessary, since all of the necessary operations can be completed in the GCP console. You should therefore complete the steps below which follow the general structure of the GCP tutorial:
1. Define the function
Choose the Cloud Functions option from the main menu in the GCP console:

On the cloud functions page, click the button to create a new item and fill in the following details:
- Name: Choose a memorable/meaningful name for your function
- Trigger: Select Cloud Pub/Sub
- Topic: Select the name of the topic you created earlier
- Runtime: Select Python 3.7
- Function to execute: log_data
Paste the code below into the editor window on the cloud function page overwriting the default function, hello_pubsub(). Notice that the function name matches the one in the Function to execute field.
1 2 3 4 5 6 7 8 9 10 11 12 13 14 15 16 17 | |
2. Check that the function is working
On the function details page, there is a chart of function invocations per second which refreshes periodically. If your function is working correctly, it will show a blue trace; if there is something wrong, the trace will be magenta.
You can see the details of esch invocation, including any output, on the logs page.
Note that the logs page does not refresh automatically. For each invocation of
the log_data() function, you should see a log message showing the data that was
sent from your Particle device.
3. Make the data more meaningful
The Particle instructions asked you to publish just a single constant value from your Particle device. It would be more interesting to publish data that actually changed over time.
You can do that easily by re-creating the circuit for measuring light intensity with a photosensitive resistor and publishing the values that it reads. Make sure that you include a delay in the firmware code. Otherwise you will quickly use use up your GCP activity quotas. One reading every ten seconds will be enough. When you have finished this step, the log messages in the GCP console should show the light level values.
Step 4: Save the data in a database
Although the messages are arriving successfully, we have not told GCP what to do with them. Because we eventually want to display them on a chart, we need to save them somewhere, and an ordinary MySQL database is ideal for that purpose.
1. Create the database
Google provides instructions for setting up a new MySQLinstance. Follow then up to the final step where you are asked to create a database table and insert some data.
Instead of the example used in the tutorial, use the code below to create the
light_data table.
1 2 3 4 5 6 7 | |
Note that all the columns have a datatype of VARCHAR apart from the timestamp.
2. Store the incoming data
Now it's time to go back to the cloud function and change its behaviour so that instead of just logging the vaues it receives, it stores them in the database.
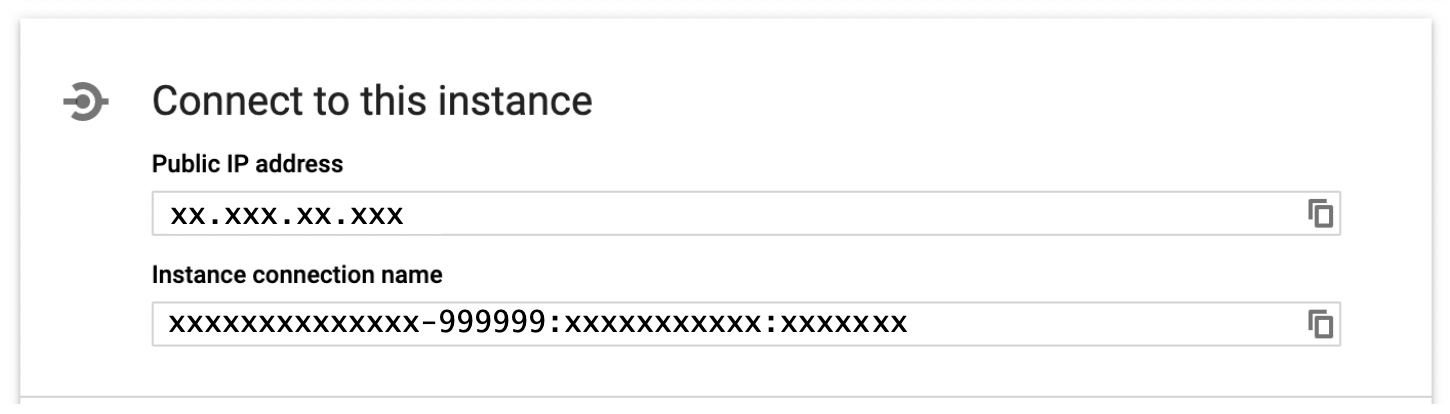
To make a connection to the database, you will need to know the password for the MySQL root user and the name of the database - use the same values as in the previous step. You will also need to know the connection name for your database. You can find this by going to the detailspage for your cloud sql instance and lookking for the box labelled Connect to this instance.
Once you have the connection name, go back and edit your cloud function. Replace the current code with the code shown below. You will need to replace the MySQL configuration value placeholders with your actual values.
1 2 3 4 5 6 7 8 9 10 11 12 13 14 15 16 17 18 19 20 21 22 23 24 25 26 27 28 29 30 31 32 33 34 35 36 37 38 39 40 41 42 43 44 45 46 47 48 49 50 51 52 53 54 55 56 57 58 59 60 61 62 | |
The code uses the library pymysql to manage the database connection,
but this library is not available by default. You can force GCP to install it by
placing an entry into the requirements.txt tab of the online editor.
We need version 0.9.3 of pymysql, so you should paste in the line below:
1 | |
Finally, change the name of the function to execute to save_data to
match the one in the code. Deploy the new version of the function and check that
data is being correctly inserted into the database table.
Step 5: Visualise your data
The last step in this exercise is to visualise your data using Google's Data Studio. Follow the steps below for the shortest route to a result:
- Go to the Data Studio landing page
- Click on Connect to data
- Choose Cloud SQL for MySQL
- Click Authorise and complete the dialog
- Fill in the connection details using the same values as in the cloud function and click Authenticate.
- Click on the name of the table that is displayed, and then click Connect in the top right-hand corner of the screen.
- Configure the data source to tell Data Studio what type of data to expect.
You should change the type of
dataandpublished_atas shown below: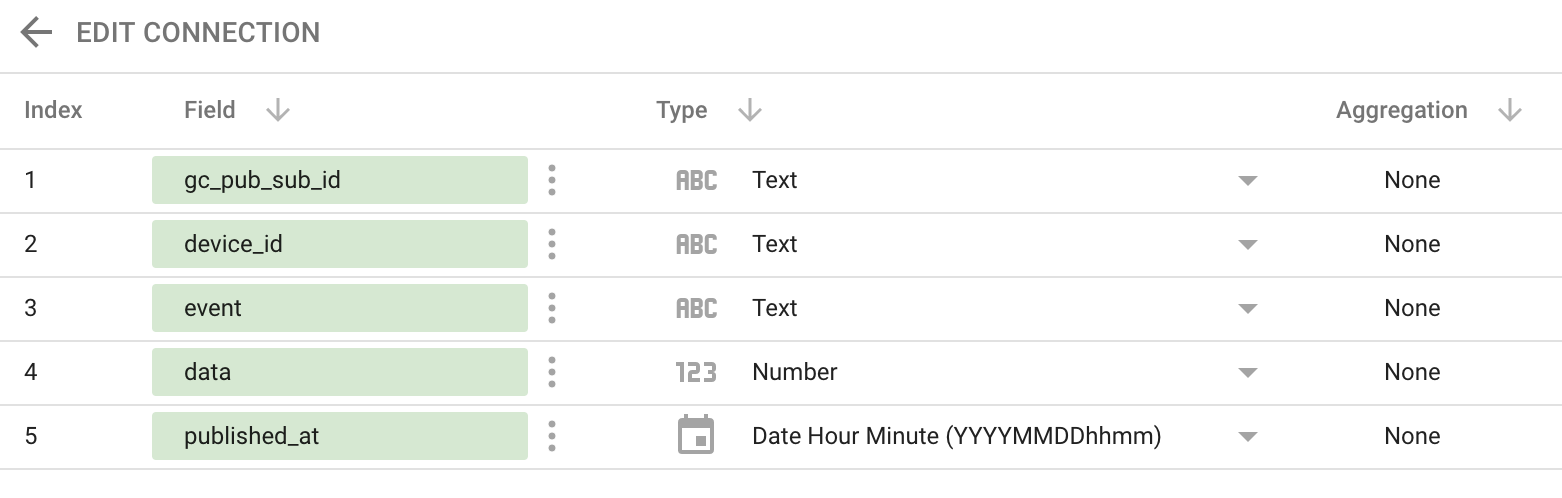
- Next, click on Create report which opens a design canvas.
- Select Line from the Add a chart toolbar menu. Click on the canvas to place the chart, or use the cursor to draw an area for the chart.
- A configuration panel appears on the right at this point. Configure the chart as shown below:

To set the Date Range Dimension and Dimension fields, drag and drop the required columns names from the list of available fields.
Also drag the data column into the Metric field and remove
the invalid metric entry which appears.
To set the sort order, click on the red Invalid field and choose
published_at from the list. Once you have done this, the chart
should display correctly. If it does not, experiment with the configuration
settings, or check out the combo chart reference
(a line chart is a combo chart where the series are all defined as lines).
Conclusion
Finally, click on View to see how the chart will look when embedded on a Web page (for example).
Note that Data Studio provides you with a console similar to the GCP console where you can view all of your reports and data sources. You can access the console by clicking the logo image in the top left-hand corner of the Data Studio page. You may wish to open the example report called Welcome to Data Studio! (Start here) for some general orientation on the way the application works.
Data Studio provides a huge range of features, most of which are beyond the scope of the current exercise. You may like to view the Data Studio help pages for further information.
If you have complete all of the steps above, you have successfully created an IoT application which collects data from hardware sensors, aggregates that data using cloud services and presents it in a form that is easy to understand.
 Particle-Google integration
 Google Cloud Platform
 Data Studio