Database setup
By this point, we already have MySQL installed and working and we can make a connection to the database from PyCharm. However, we also need to be able to connect to the same database from our application code. That requires two modifications:
- We need to add the required packages to our virtual environment
- We need to specify the connection parameters (user, password and database name) in the application configuration
Python packages
The packages we need are
- flask-sqlalchemy: SQLAlchemy is an Object Relational Mapper (ORM), which means that it allows the tables in a relational database management system to be represented as objects in the application code. This package provides you with a range of intuitive Python operations for database transactions that avoid the use of raw SQL. This is convenient because it simplifies queries that may have been complex if written in raw SQL. Additionally, it reduces the risk of SQL injection attacks since we are not dealing with the input of raw SQL.
- mysql-connector-python: This is a Python interface to MySQL. Over time, a number of connection packages have been created, and it is important to select the right one. This one is maintained by Oracle, the company that owns MySQL.
Although we could add these packages using conda at the command line, we will actually
take advantage of the Anaconda integration in PyCharm instead. First, open the
Settings dialogue from the File menu (Preferences on Mac from the application menu).
Here, you can manage the packages in the environment as shown in Figure 11.
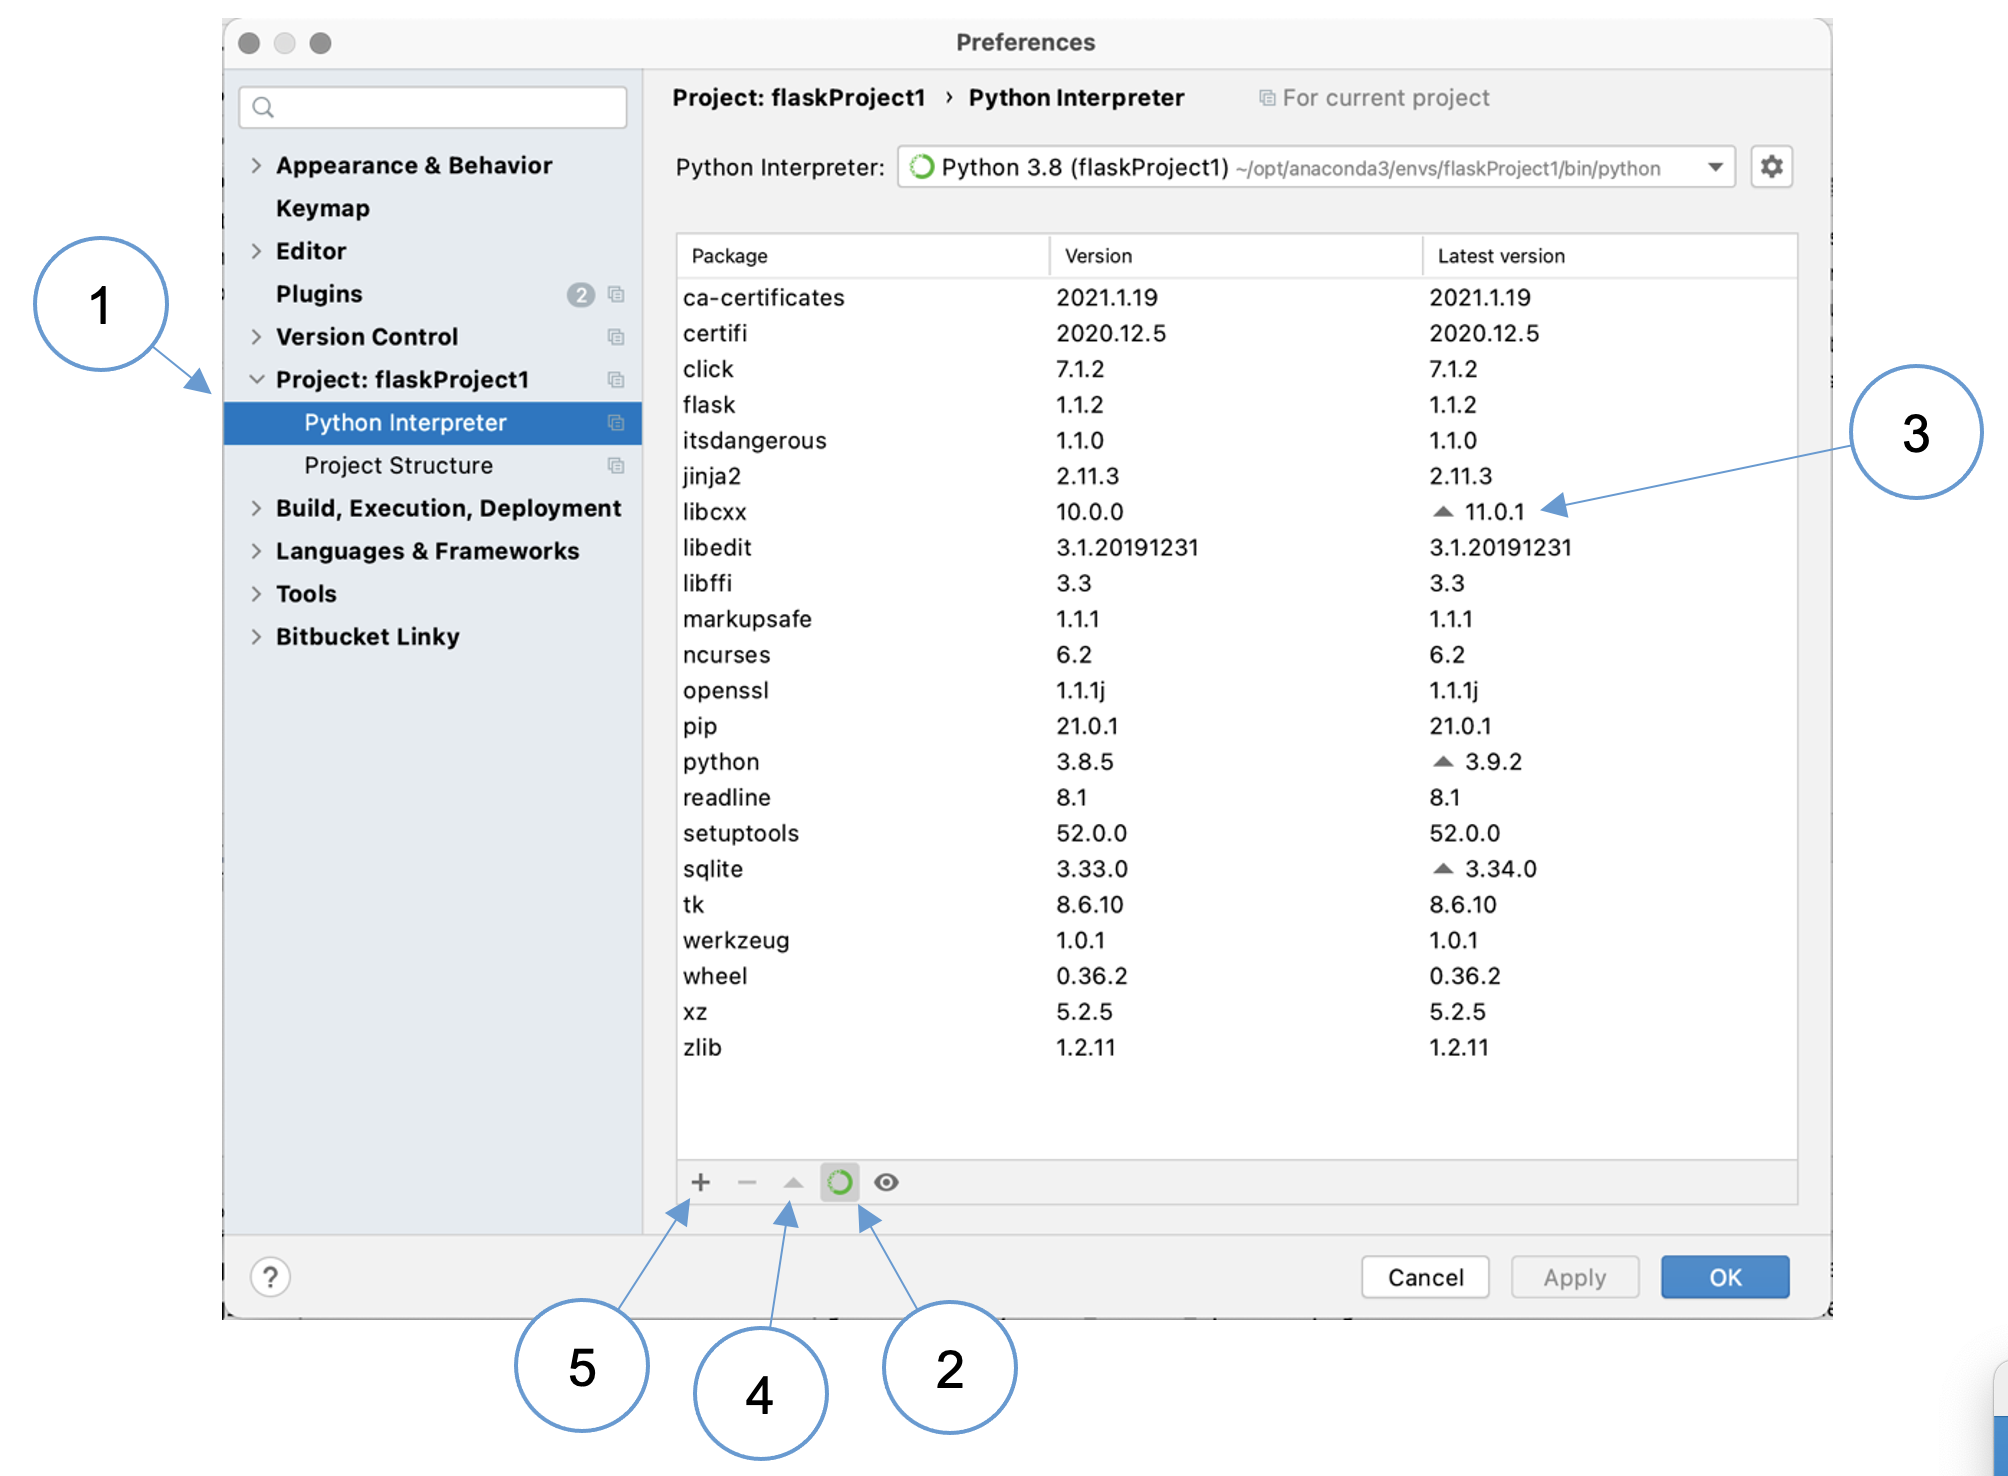 Figure 11: Environment configuration
(1): First, activate the Python Interpreter section associated with the current project.
(2): Make sure that you are using the conda package manager.
(3): Once the list has been completely populated, the data may show that certain packages can be upgraded.
(4): Highlight one or more of the upgradable packages and click the upgrade icon. The upgrade may take a long time. A progress bas is displayed at the bottom of the main PyCharm window.
(5): Click the plus icon to install a new package
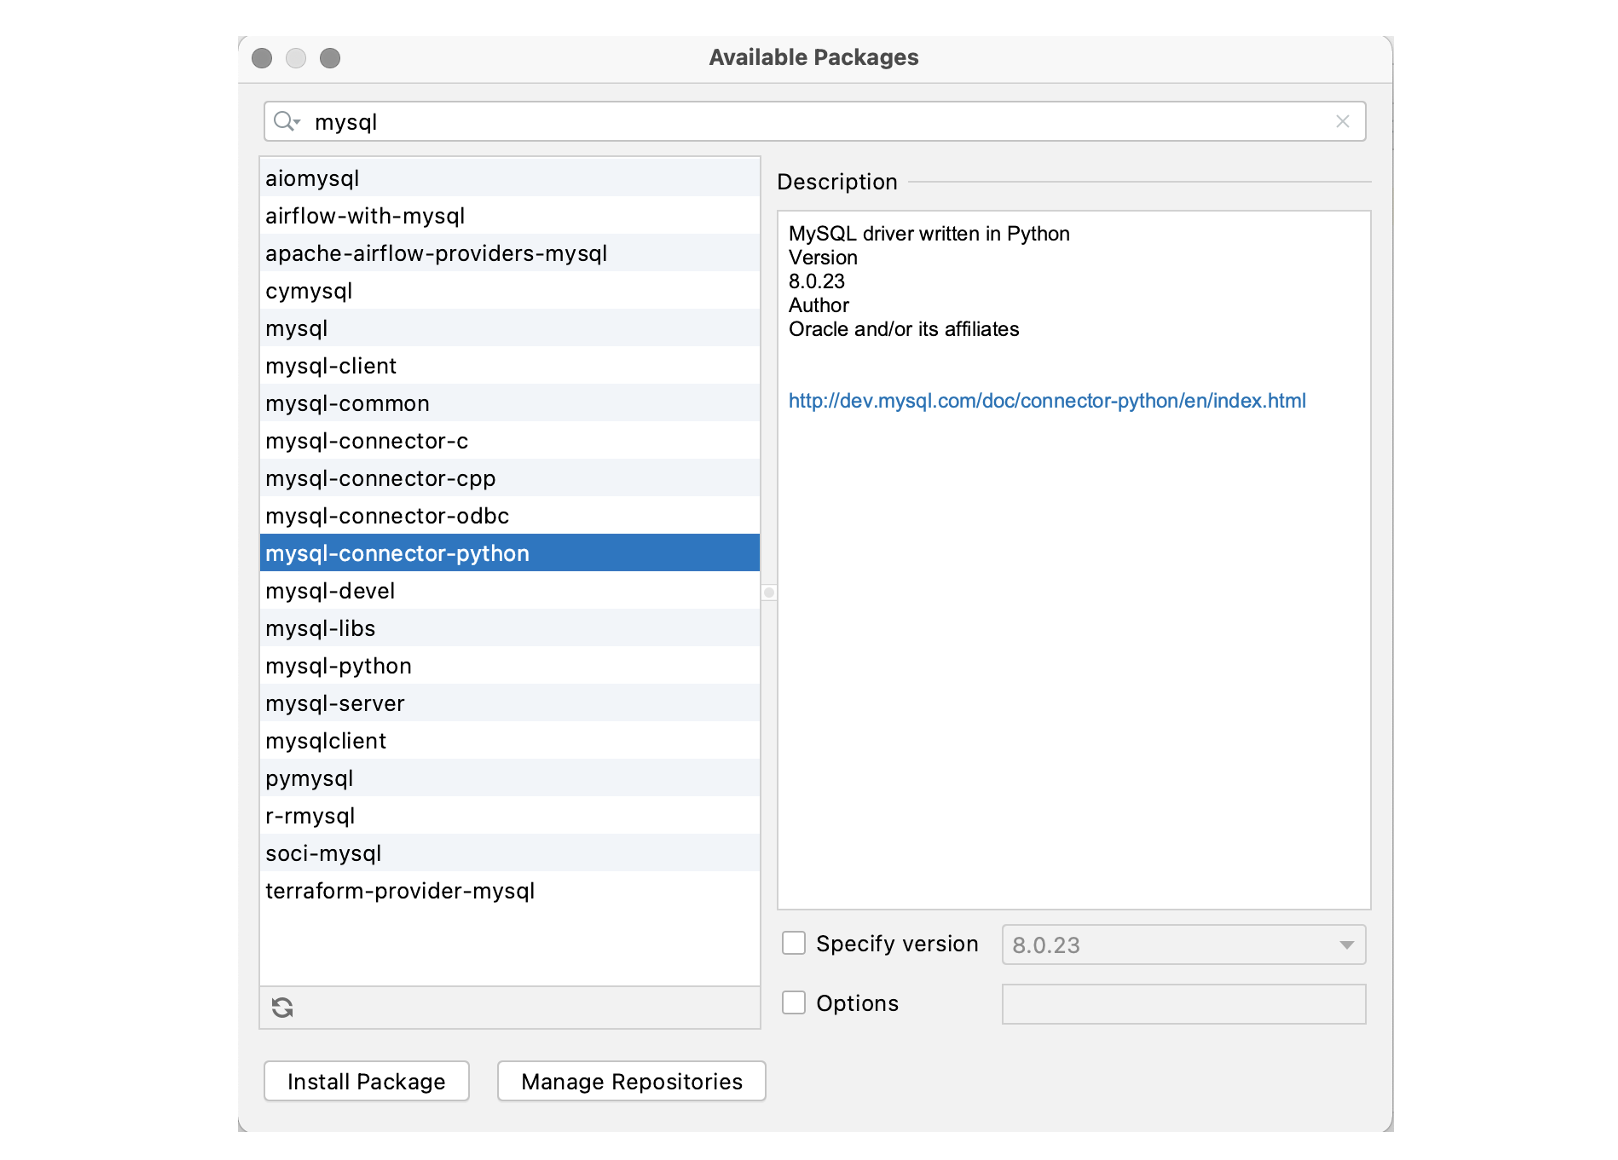
It may take a long time to populate the next dialogue because it is downloading information
about all packages available in the Anaconda distribution. Once the data is displayed, find
mysql-connector-python as shown in Figure 12 and add it to the environment by clicking
Install Package.
Do the same for the package flask-sqlalchemy.
Configuration settings
As well as adding the capability to connect to MySQL, we also need to provide the
application with the information it needs to connect to the specific database that we
created for it. To do this, we will need to update the configuration files. First, we
will make sure that we get full visibility of database operations while in development mode.
Update the global config.py file to match the code below - notice the additional setting
at line 8.
1 2 3 4 5 6 7 8 9 10 11 12 13 14 15 16 | |
Setting the
SQLALCHEMY_ECHOvariable totruemeans that every database operation will be echoed to the console. This is useful during development, but very undesirable in production.
Next, we need to update the instance-specific config.py file to add the local database
connection string as shown below.
1 2 | |
The
SQLALCHEMY_DATABASE_URIvalue has the format<database driver>://<username>:<password>@<hostname>/<database name>.
The values should be familiar from the database creation section of the tutorial.
There is still one further step required: we need to add a database connection to the Flask
application object. This is done by modifying the application factory function in
app/__init__.py as shown below.
1 2 3 4 5 6 7 8 9 10 11 12 13 14 15 16 17 18 19 20 | |
Explanation
Line 3: Import the SQLAlchemy ORM
Line 8: Create an instance of the SQLAlchemy ORM. Notice that
dbis a global variable which can be referenced in other files using the Pythonimportmechanism.Line 15: Links the SQLAchemy ORM to the application
Ideally, we would test the connection at this point; however, there are currently no tables in the database. Because we will be using SQLAlchemy to access the database, we have to ensure that we create a corresponding object definition along with each table. This is covered in the next section of the tutorial and we will exercise the database connection as we go along.
 SQLAlchemy reference