Presentation
So far, we have been taking no account whatsoever of presentation, and our page layouts rely only on the default browser behaviour. The results are ugly, difficult to use and also require a lot of effort to maintain. Before going any further we need to improve the visual aspect of the application and at the same time make some improvements in structure so that the rest of the development will be easier.
Bootstrap
We will be using Bootstrap to improve the appearance of the application and to provide some additional user interface features. The Bootstrap-Flask package integrates Bootstrap into Flask applications.
Please note that this extension is one of the few that is not available through Anaconda at the time of writing. There is an older extension called Flask-Bootstrap, but it is a little outdated and does not provide support for Bootstrap 4.0.
To install Bootstrap-Flask, open the terminal panel in PyCharm and type or paste in the following command:
1 | |
To include the new package's functionality in the application, we need to make two additions to
app/__init__.py. The first is to add the third=party import shown below.
1 | |
Then in the factory function, add the line shown below in a convenient place. This could be, for example, just before the lines that register your blueprints.
1 | |
Bootstrap makes many aspects of development more convenient. Although the code we have written
so far is very simple, we can already make an improvement to our subject group template file
by using the WTForms integration features of Flask-Bootstrap. We originally wrote an explicit
<form> element into our template, but in fact we can replace it with the quick_form()
function as shown below.
1 2 3 4 5 6 7 8 9 10 11 12 13 14 15 16 17 | |
Points of interest
Line 1: Import the
render_form()function from the bootstrap form template.Line 13: This single lone replaces the entire
<form>element. Notice that it automatically includes the form method and action, and it also generates the CSRF token.
If you restart the application and run the page at this point, you will only see a minor change - the Save button now appears on a different line. However, we have now set the scene to take advantage of some of the more powerful features of Bootstrap. We will build these in over the course of the next few sections.
Template inheritance
You may have noticed that some parts of the templates we have written so far are identical. This goes against the DRY principle (Do not Repeat Yourself). Jinja2 can help eliminate this redundancy by allowing one template to inherit properties from another. That way we can define a base template for our application which captures the common features. This goes far beyond just removing pieces of boilerplate HTML, though. For example, we will need to provide the application user with a menu to navigate around the different pages, and that menu should be visible on all pages. The base template is also a way of grouping all of our css and script imports into a single place.
Base template
Let's start building our template structure by defining a base template. The key features will be
explained afterwards. Create the file app/templates/base.html and paste in the following code.
1 2 3 4 5 6 7 8 9 10 11 12 13 14 15 16 17 18 19 20 21 22 23 24 25 26 27 28 29 30 31 32 33 34 35 36 37 38 39 40 41 42 43 44 45 46 47 48 49 50 51 52 53 54 55 56 57 58 59 60 61 62 63 64 65 66 67 68 69 70 | |
Explanation
Line 5: Templates can be organised into blocks. A template that inherits from this one can override a block by redefining it.
Line 8: The template specifies an image file to use in the browser tab.
Line 10: Blocks can be nested. This allows templates to be selective in the parts of the parent that they override.
Line 11: The Bootstrap-Flask extension provides the convenience function
load_css()to initialise the Bootstrap css (see also Line 58)Line 12: Bootstrap provide an icon library which can be loaded from CDN
Line 13: Imports a local stylesheet where any custom styles are defined.
Line 16: Some blocks in the base template are empty purely to provide placeholders for detailed content in child templates.
Line 28: The base template defines the main navigation that is present on all pages.
Lines 31 - 32: These two lines define a logo element that appears at the left-hand side of the navigation bar. Clicking on the logo element will return the browser to the home page.
Lines 34 - 36: Using Bootstrap it is easy to make your page responsive. These three lines define a link for viewing the menu which is only visible when the browser window is narrow. This is useful when viewing the page on a mobile device.
Line 39 - 51: This combination of elements defined a dropdown menu.
Lines 57 - 59: The block defines a placeholder for the main content of a child page.
Line 61: Placeholder for a page footer.
Lines 63 - 66: Following the main page content is a block where scripts are loaded. This includes the main Bootstrap script using the Bootstrap-Flask convenience function, and a local script file.
Static files
Later in the development, we may need to define custom styles and scripts. The base template makes reference to these files, and here we create empty placeholders for future use.
The two files required are app/static/css/styles.css and app/static/scripts/script.js, so the
first thing to do is to modify the directory structure of our application. Specifically, we need
to create the static branch as shown below.
    └── students_app
        └── app/
            └── static/
                ├── css/
                ├── images/
                └── scripts/
The static directory contains files such as scripts, style definitions and images. With the
directories in place, create the files app/static/css/style.css and app/static/scripts/script.js.
Download the logo image (credit to Pinclipart) and save
it to the directory app/static/images.
Using the template
The new template contains a lot of features that should appear on every page. On any given page,
we therefore only need to think about the content that is unique to that page. Everything else is
handled by the template. To take advantage of template inheritance, we can modify the index.html
template that we created earlier as shown below. You will see that most of the original content
has been replaced because it is now part of the template.
1 2 3 4 5 6 | |
Explanation
Line 1: Link to the base template.
Lines 2 - 6: Override the placeholder block on lines 57 - 59 of the base template.
Lines 3 - 5: This is the unique content of the page that is placed into the
contentblock.Line 3: The new
divelement makes use of some Bootstrap styles to centre its content horizontally.
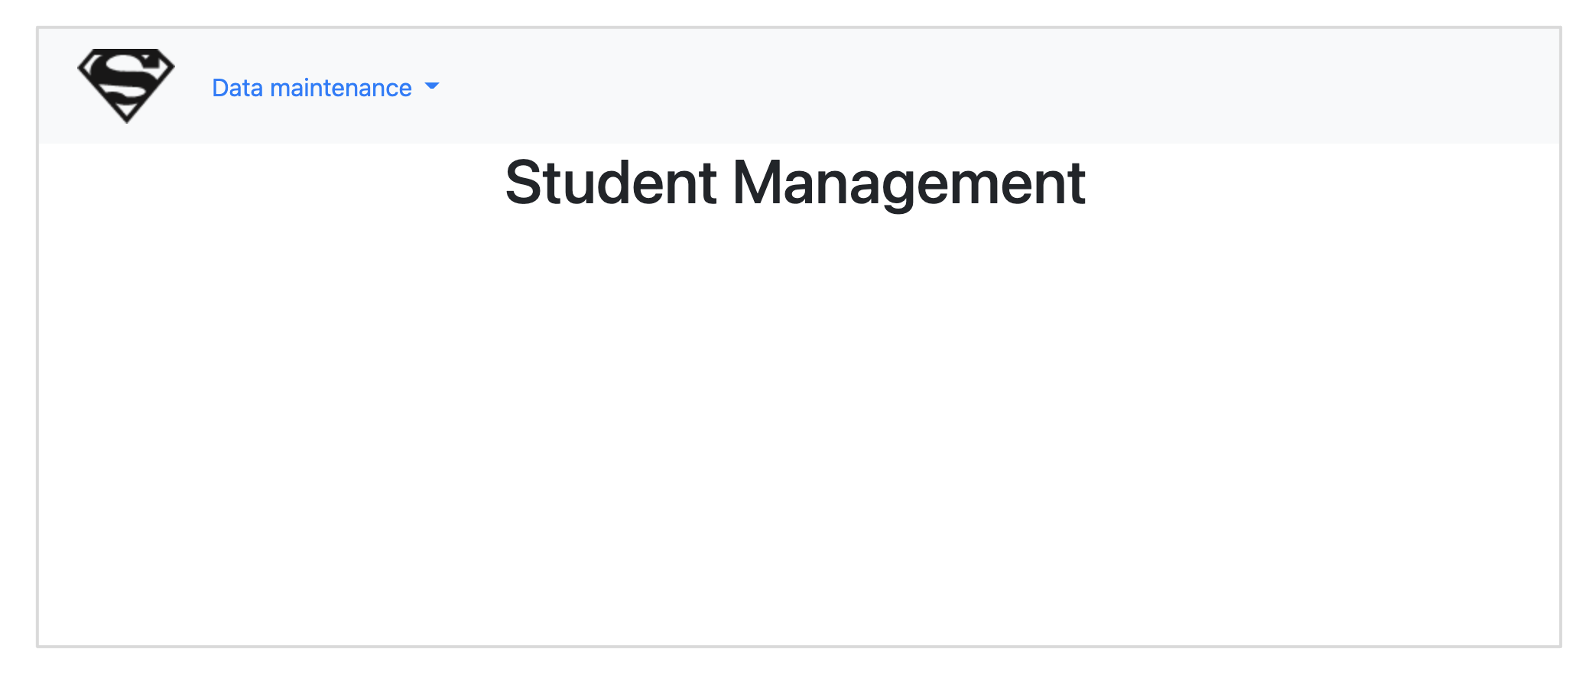
Restart the application and navigate to the index page. You should see a styled home page with a logo and active navigation as shown in Figure 16.
Linking templates (list page)
Although the menu works, the new styling has not yet been applied to the subject group pages. To
implement this, we need to reference the base template in the page templates. Open the file
app/templates/admin/subject_groups.html and modify the content to match the code
below. NB. Don't copy and paste the code below - it is not complete!
1 2 3 4 5 6 7 8 9 10 11 12 13 14 15 | |
Explanation
Line 1: Directive that links this template to the base template.
Line 2: Override the content block.
Lines 3 - 4: Use some Bootstrap styling to centre the content.
To improve the appearance of the table, find its opening tag and replace the line with the following.
1 | |
The New link can also be improved by applying styling to give it the appearance of a button. Find the line where the New link is defined and replace it with the following.
1 | |
Linking templates (form page)
We need to do a similar job on the subject_group.html file. Edit the contents to match
the following.
1 2 3 4 5 6 7 8 9 10 11 12 13 14 | |
Take a look at the new version of the template - notice anything interesting? By using the
render_form() function, we have removed all explicit references to the subject group model.
This means that the template will work in any situation where the only page content is a
rendered form. We can take advantage of this generality by renaming the template to
form_page.html and moving it up to the templates directory instead of the admin
subdirectory. We will also need to make a corresponding change to the file
app/admin/views/subject_group.py to update the two lines where the template is referenced.
You will find these reference in the add_subject_group() and edit_subject_group()
functions.
Using Bootstrap icons
The final piece of styling we will do before moving on will be to replace the text on the Edit and Del links with icons. For this, we will use the Bootstrap icon library that we loaded as part of the base template.
Bootstrap icons can be embedded in several different ways, and here we will use the font representation. This simply consists of adding an icon tag with the required class.
Open the file app/templates/admin/subject_group.html and find the Edit and Del
links. Replace the existing code with the following.
1 2 3 4 5 6 | |
Points of interest
Lines 1 & 4: Notice the addition of the
titleattribute to provide popup text.Lines 2 & 5: Bootstrap icon references.
Flash messages
Flask includes a simple method of providing feedback to users on the results of the most recent operation. The message is delivered along with the next http request and is then discarded. Message flashing can be used to confirm database operations, for example, or for reporting errors. Here, we will add a confirmation message when a new subject group record is created.
Creating a flash message
We need to make some changes to the file app/admin/views/subject_group.py. The first one is to
import the flash function from the flask package. Modify the import statement at the
beginning of the file so that it matches the following.
1 | |
Then we need to add the message itself. Scroll down to the add_subject_group() and modify it so
that it matches the following.
1 2 3 4 5 6 7 8 9 10 11 12 13 14 15 16 17 | |
Points of interest
Line 8: Success message
Line 11: Error message
If no category is supplied in the second parameter, the message type defaults to info. There is
also a warning type available.
Displaying flash messages
Any messages have to be displayed in an HTML div element. First, we will do things the simple way
and use a Bootstrap-Flask macro to all the work for us. Because message may be delivered
to any page of the application, it makes sense to process the messages in the base template.
Open app/templates/base.html and add the following line at the start of the file.
1 | |
Then add the following line after the navbar block and before the div containing the content
block.
1 | |
Restart the application and try out the new feature. The default behaviour might be sufficient for your purposes, but if not, the following example illustrates how to display messages as toasts.
First, edit the base template again and add the following code before the head element.
1 2 3 4 5 6 7 8 9 10 11 12 13 14 | |
The code adds a new div element for each message and displays it for three seconds. In addition,
it adds a css class to the div which animates it. The required css code shown below is based on
an example from W3Schools. Copy it
and paste it into the file app/static/css/style.css.
1 2 3 4 5 6 7 8 9 10 11 12 13 14 15 16 17 18 19 20 21 22 23 24 25 26 27 28 29 30 31 32 33 34 35 36 37 38 39 40 41 42 43 44 45 46 47 48 49 50 51 52 53 54 55 56 57 58 59 60 61 62 63 64 65 66 | |
When you restart the application to see the new message presentation,you may have to clear your browser's cache. On Chrome, you can force the browser to reload static files by holding down the SHIFT key as you refresh the page.
Exception handling
With the new flash messaging in place, you can see what happens when a database error occurs. In
the subject group model, the name field was defined as being unique. That means that the database
will reject any attempt to insert a record with a duplicate name. If you try adding two subject
groups with the same name in the current version of the application, you will just see the generic
error message. This is not very helpful for understanding what has gone wrong. It would be better
to return the actual error message from the database.
Edit the file app/admin/views/subject_group.py and add the followinf import statement at the
start.
1 | |
Then add the following more specific exception clause before the existing one in the function
add_subject_group().
1 2 3 4 | |
A try: ... except: block can include several except: clauses and the first one that matches the
error will be executed. In this case, any database errors will be trapped by the new clause and
any other errors will be trapped by the original one.
Custom error pages
Web applications make use of HTTP errors to let users know that something has gone wrong. Default error pages are usually quite plain, so we will create our own custom ones for the following common HTTP errors:
- 403 Forbidden: this occurs when a user is logged in (authenticated), but does not have sufficient permissions to access the resource.
- 404 Not Found: this occurs when a user attempts to access a non-existent resource such as an invalid URL.
- 500 Internal Server Error: this is a general error thrown when a more specific error cannot be determined. It means that for some reason, the server cannot process the request.
We'll start by writing the views for the custom error pages. In your app/__init__.py file, add the
following code after the registration of the blueprints:
1 2 3 4 5 6 7 8 9 10 11 12 13 14 15 16 17 18 19 20 21 22 23 24 25 26 | |
You will need to update the import statement at the start of the file to import the render_template
function from flask.
Now we need to add the error template itself. Create the file app/templates/error.html and
paste in the following code.
1 2 3 4 5 6 7 8 9 10 11 12 13 14 | |
Summary
This section has presented some simple ways to improve the appearance of the application and the usability of the interface. However, we have barely scratched the surface of what can be achieved with the Bootstrap framework and with custom css and javascript. We have not even begun to consider other third-party widgets that could be integrated into the application.
 Bootstrap 4 Get Started