Import schema
Removing a schema
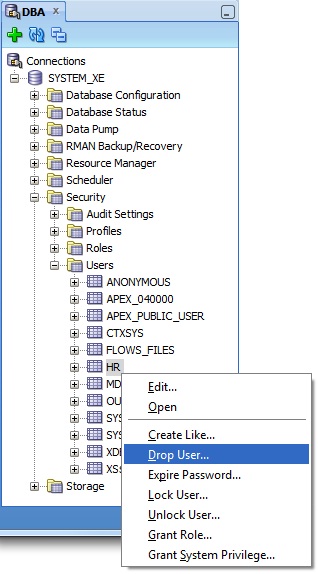
The management of user accounts is an important responsibility of the database administrator which will be discussed further later in the module. Simply removing a user account is a simple process, however, that needs very little background knowledge. Simply expand the Users branch of the DBA explorer as shown below, right-click on HR and choose Drop User... from the pop-up menu.
Note that if HR is connected to SQL Developer, you will not be allowed to drop the account. Disconnect first by right-clicking the connection in the top pane.
You will see that the account name disappears from the list in the DBA explorer, and if you want further confirmation that the account has indeed been removed, you can try to connect to it in the SQL Developer Connections pane.
Importing a schema
SQL Developer provides a Data Pump import wizard which is very similar to the one you used to export the schema in the first place. You can start it in the same way too by right-clicking on Import Jobs in the DBA explorer.
Unfortunately, presumably due to a design oversight, the wizard does not allow you to browse for a file in the default directory. In order to start the import, therefore, you need to know two things:
- The location of the default export directory
- The name of the export file you created
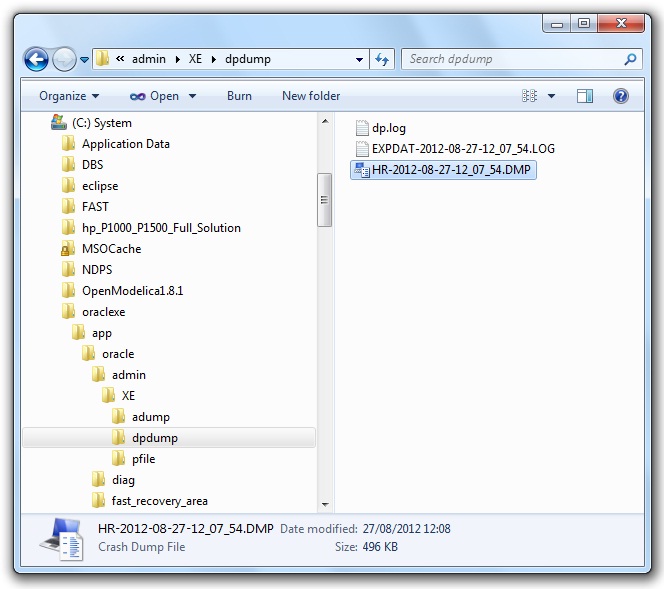
Remember that the file name contains a timestamp. This is useful when working out which file to use when there are many in the directory, but you need to get the format of the timestamp correct. In a Windows file explorer window, navigate to the export directory as shown below. Once there, the required file is easy to identify. You can also copy the file name (so that you don't have to remember it to type into the import wizard) by clicking on it twice as if you were going to rename it.
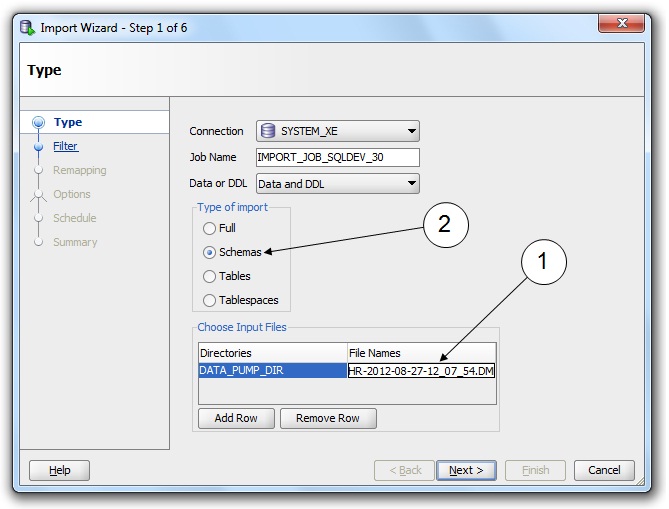
Once you have found the correct file name you can enter it into the appropriate field in the import wizard as shown below (1). Also, be sure to choose the Schemas option (2) before continuing.
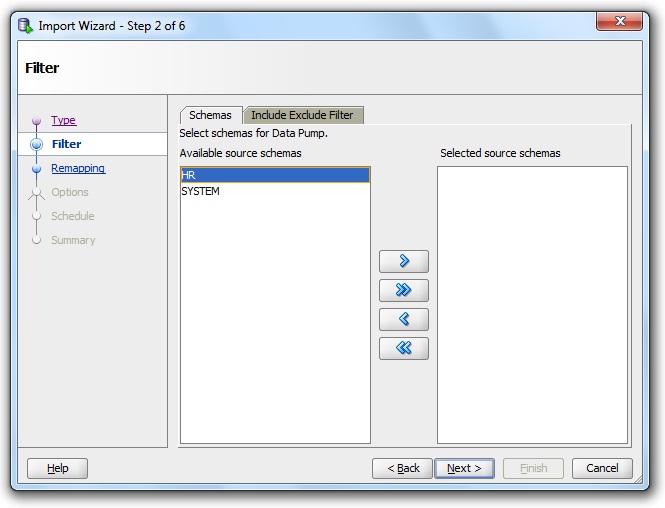
On clicking next, Data Pump examines the contents of the export file and offers you a list of schemas to import. Notice that the SYSTEM user is listed even though you only exported HR. This is because some of the information about the HR user is contained in tables owned by SYSTEM and extracts from those tables therefore also have to be exported as well. For importing, you only need to select HR as shown below.
You can accept the default value in all of the other steps of the wizard. Once the import is complete the HR user will have been restored. However, you will need to right-click on the Users branch in the DBA explorer and choose Refresh to see it in the list. You can make sure that the import has been successful by reconnecting as the HR user in the Connections pane and viewing the user's tables.
Further information
For more practice importing and exporting objects using Data Pump, follow the Oracle Data Pump tutorial link.