Raspberry Pi broker
Because MQTT works over TCP, a device can connect to a broker anywhere in the Internet provided that it has a WiFi connection. The link on the right shows a list of publicly available brokers that can be used for prototyping and testing.
A cloud-based broker is not always practical if there are restictions on
the network as there are on Eduroam for example. An alternative is to use
a local WiFi network based on a Raspberry Pi which has already been
configured as a WiFi access point, and which has Mosquitto installed. To
pass messages via the Pi, your device must be connected to it via WiFi,
and you will need to know its IP address. You can find the details of your
Pi in the table below. The password is
Raspberry in all cases.
| Number | SSID | IP address |
|---|---|---|
| 1 | RPi1 | 192.168.1.1 |
| 2 | RPi2 | 192.168.2.1 |
| 3 | RPi3 | 192.168.3.1 |
| 4 | RPi4 | 192.168.4.1 |
| 5 | RPi5 | 192.168.5.1 |
| 6 | RPi6 | 192.168.6.1 |
Testing the Pi with a phone
The job of the Pi is to receive messages from connected clients and to forward them to subscribers. To test this functionality, you will need two connected devices, one to act as publisher and the other to act as subscriber. The test devices can both be mobile phones using an appropriate app.
MQTT Dash is a free Android app which works well. Follow these steps to use MQTT Dash to test your Pi.
- Install MQTT Dash.
- Connect to your Pi's WiFi network
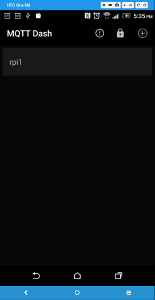
- Start MQTT Dash - this will display the first page shown in Figure 3.
- Add a new broker by clicking the plus icon in the top right-hand corner. This will display the second page shown in Figure 3.
- Fill in the name and address of the broker (eg. RPi1, 192.168.1.1), then click the disk icon in the top right-hand corner.
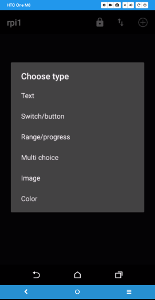
- Tap on the broker entry, then tap on the plus icon in the top right-hand corner of the page to add a new subscription. This will display the third page shown in Figure 3.
- For this test, choose the
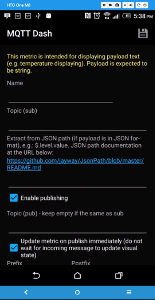
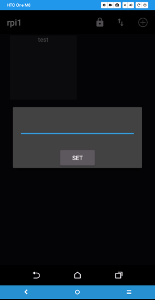
Textoption. Then when you see the fourth page shown in Figure 3, enter a name for the subscription and the topic (eg,test). Tap on the save icon. - A subscription is shown as a tile on the broker page as shown in the
fifth page in Figure 3. To send a message on this topic to the broker,
tap the tile, write the message in the field displayed, and then tap
Set.


When a message is sent using the procedure above, it will appear in the subscription tile of any other mobile device with a similar subscription. Try this a few times experimenting with different topic strings.
Testing the Pi with a laptop or desktop computer
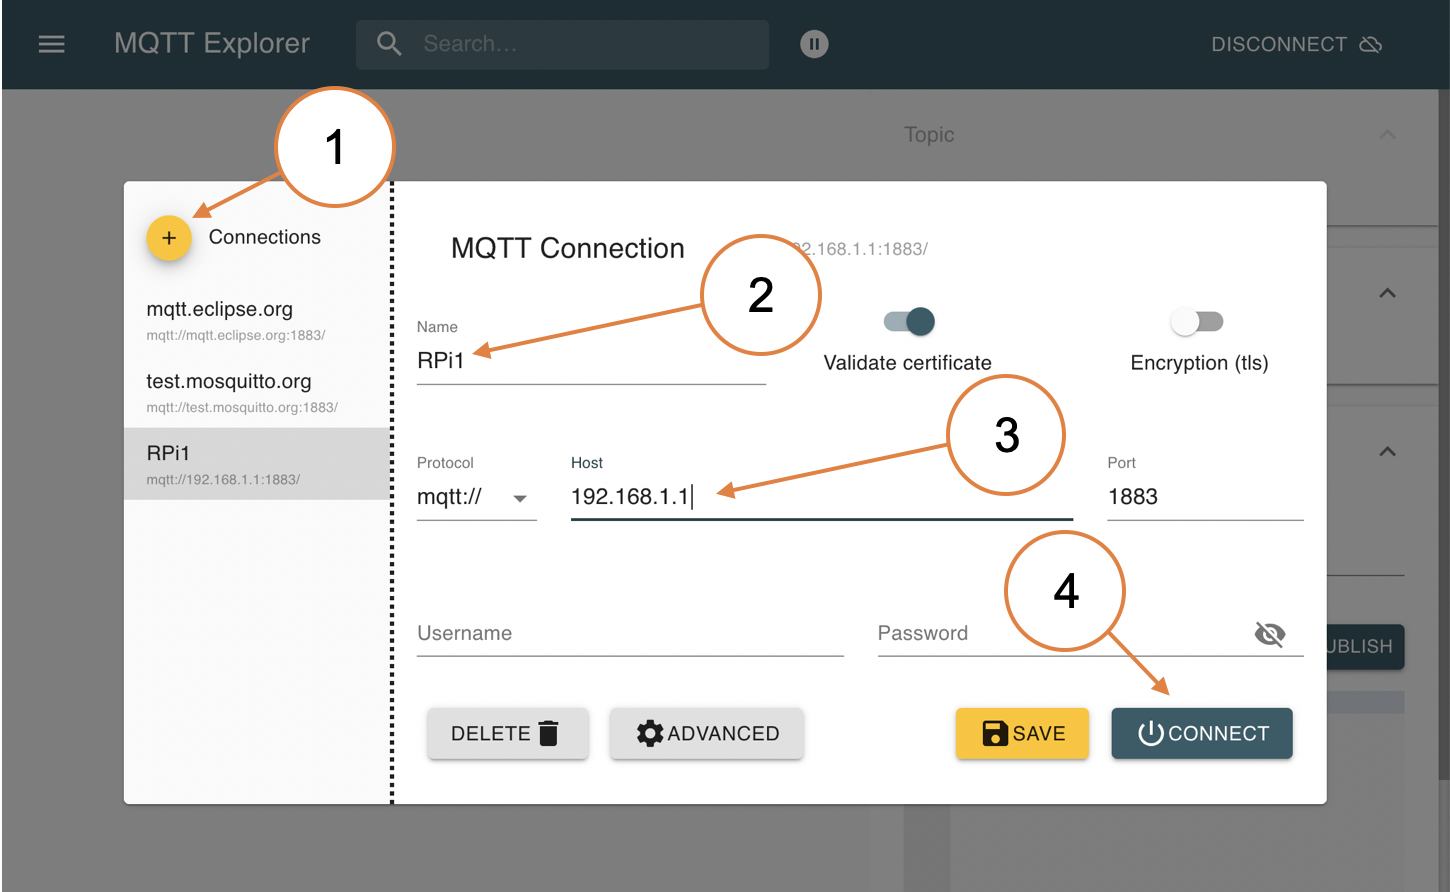
You can also test the MQTT broker using a laptop if you install
MQTT Explorer. To
connect to the Pi, first create a new connection by clicking the plus sign
as shown in Fig. 4. Then enter and host name and IP address and click the
Connect button. MQTT Explorer allows you to publish and
subscribe to a topic and has a number of advanced features which are
described on the app Web site.
 Public MQTT brokers
 MQTT Dash
 MQTT Explorer