Arduino programming
An Arduino program is called a sketch - the idea is that it is quick and easy. You can recognise an Arduino sketch because its filename ends in ino. When you install the Arduino integrated development environment (IDE), there are many example sketches available to help you learn about the language. The IDE is very simple - its main features are shown in the diagram below.
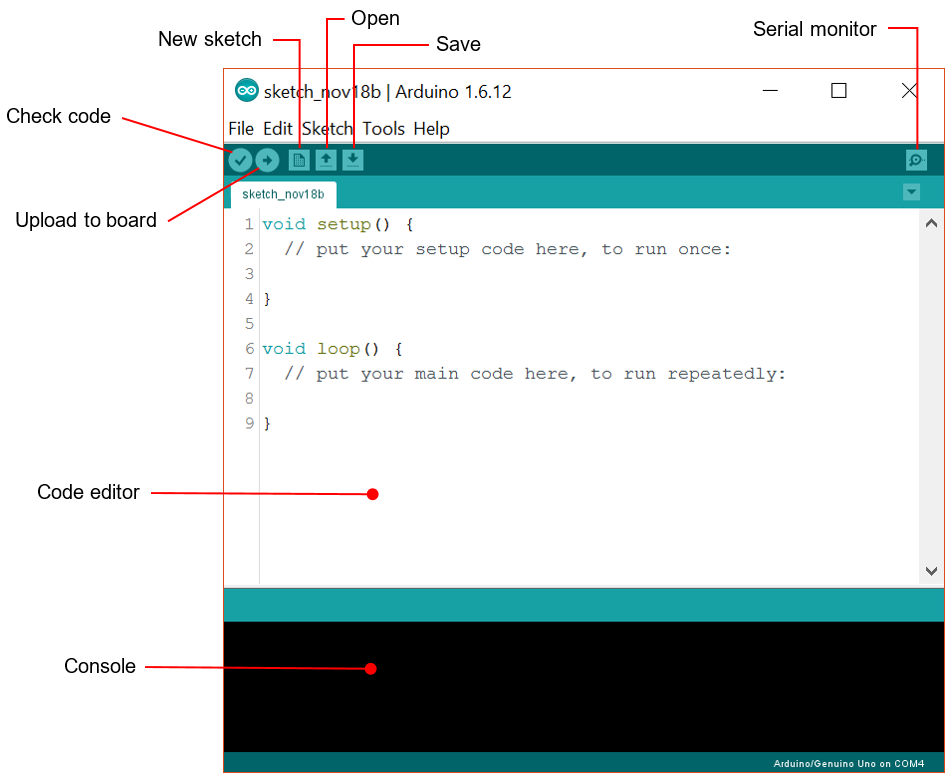
When you first open the IDE or start a new sketch, the two functions setup() and loop()
are created automatically as shown. This is the standard structure of an
Arduino sketch. The setup() function runs
once when the sketch runs. Its job is to initialise any variables, set
digital and analogue pins to input or output mode, and generally to get
ready to run the program. The loop()
function - as its name suggests - repeats continuously. This allows your
sketch to respond to changing inputs without having to design detailed
control structures yourself. Note that there is no delay automatically
built into the loop. when the code in the loop()
function finishes, it starts again immediately. If you want it to only run
once a second for example, you would need to introduce a delay of 1000
milliseconds using the delay() function.
This is demonstrated in the first example sketch called blink.ino.
You can find this example sketch on the File menu: File → Examples →
01.Basics → Blink.
When you first start the IDE, you need to make sure that your Arduino board is connected. You can do that by looking on the Tools menu as shown below. In the example, the correct Arduino board has been selected, and under the Port option, you can see that it is connected on port COM4. If you don't see a similar option on your PC, you may have to disconnect the Arduino and restart the IDE. On older computers, a COM port was a physical device. On newer computers, a virtual COM port is created in by a software driver which converts the signals from the physical USB connection to a simple serial data stream. Sometimes the software that does this need to be restarted. If you still can't see your board after restarting the IDE, you should consult the Arduino troubleshooting page for possible solutions.
If your board connects correctly, you can open one of the example sketches and upload it to the board by clicking the upload button in the IDE. Some messages will appear in the console and after a few moments, the sketch will start to run. blink.ino is the best example to start with because it does not require any other hardware components.
 Arduino Web site
 TutorialsPoint