HTML webserver
Summary
This is a Tutorial showing how to implement a a Webserver using the ESP8266 Board and WebREPL.
Requirements
- 1 x LOLIN D1 MINI PRO board
- 1 x Micro USB
- WebRepl
Establish connection between ESP8266 Board and Computer
Connecting board to computer using Putty
This step should be easy if you completed successfully tutorial one.
-
Connect your micro usb to your board and the other end to your computer
-
Open PuTTY and select Serial connection type
-
Use the appropriate Serial line and enter speed 115200 (The serial line that the board is connected to can be found in device manager under ports).
Connect to WebRepl
It is recommended to finish the Network and WebREPL tutorial before continuing on this tutorial
-
Enter the command shown below into the micropython framework to start WebREPL:
1
2
import webrepl webrepl.start() -
Next connect to the boards wifi network that was previously implemented in the network tutorial.
-
Continue by opening up WebREPL page and press connect to establish a connection between the board and WebREPL. WebRepl should open up as shown below and enter the password that has been setup in this case its "napier" and it will show WebREPL connected.

Implementation of HTML server
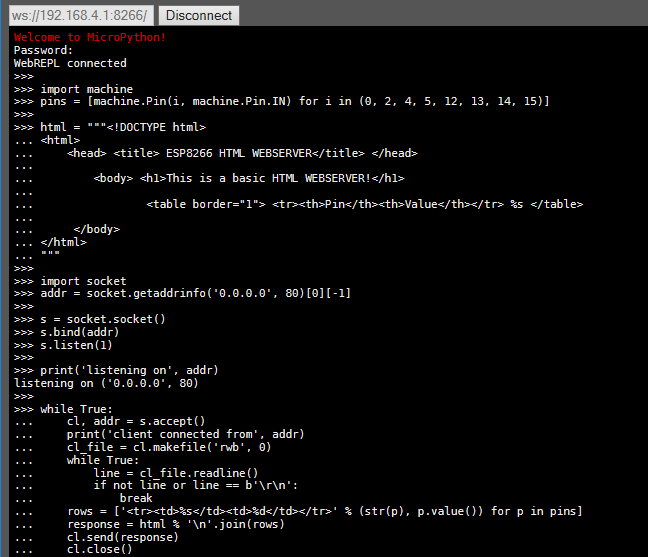
After connecting to WebREPL successfully enter the command shown below to set up a basic HTML server which is shown as a single website and contains a table with the state of all General Purpose Input/Output pins:
1 2 3 4 5 6 7 8 9 10 11 12 13 14 15 16 17 18 19 20 21 22 23 24 25 26 27 28 29 30 31 32 33 | |
- This is how it should be shown on WebREPL:
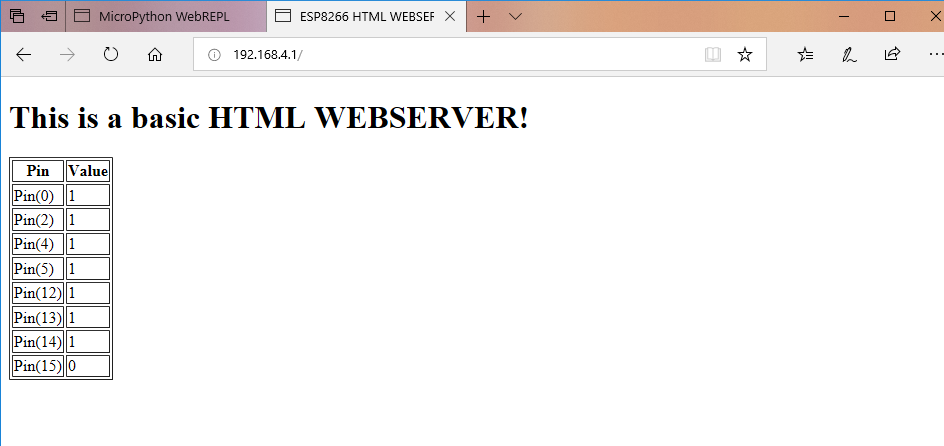
- Next a new tab should be opened and the IP address for the webserver will be entered in the URL bar as in this case it is 192.168.4.1 and press enter.

- If the HTML server was successfully implemented as shown in this tutorial then the Server page should look like this:
End of Tutorial 8- HTML SERVER