Introduction
 These notes cover the initial setup of the Particle Photon 2 IoT
development board. A lot of good information is available from the
Particle website, and links are provided where appropriate.
One of the attractive features of Particle boards is that there are
several different ways to interact with them according to the
requirements of the application. In this setup tutorial, we will mainly
be using the Web IDE but we will start by using the Particle
command-line interface (CLI) to get your device connected to wifi.
These notes cover the initial setup of the Particle Photon 2 IoT
development board. A lot of good information is available from the
Particle website, and links are provided where appropriate.
One of the attractive features of Particle boards is that there are
several different ways to interact with them according to the
requirements of the application. In this setup tutorial, we will mainly
be using the Web IDE but we will start by using the Particle
command-line interface (CLI) to get your device connected to wifi.
Opening an account
Go to the Particle web site and create a personal account. This will allow you to use all of Particle's online services. While you are using the device for University work, it will belong to your account.
Install the CLI on your computer
Follow the instructions for your operating system
The installation makes the command particle available at your
operating system command line. On Windows, that means that you need to open
the CMD tools, and on Mac or Linux you need to open a new terminal window.
To test the installation, execute the command particle --help. You should
see a list of available sub-commands.
Log into your Particle account
Type the command particle login and then enter you details when prompted.
Make sure your device is up to date
There is a small piece of firmware on your device which is responsible for communicating with the Particle device cloud. This code is called the DeviceOS even though it is not really an operating system. In this step, you will make sure that you are using the latest version of DeviceOS.
First, connect your device to your computer using the micro-USB connector.
There is a multi-colour LED onboard the device. The colour and the way it flashes show which operating mode it is in. You can change the mode by holding down the mode button and pressing and releasing the reset button. Click the image of the board at the top of this page to locate the two buttons.
The flash pattern changes as you hold down the mode button. When it shows the pattern corresponding to the mode you want, release the button. Use the link at the foot of this page to find a list of all operating modes. To complete this tutorial you do not need to know them all - just follow the instructions provided.
You need the Device Firmware Upgrade (DFU) mode which is indicated by the LED flashing yellow. So...
- Hold down both buttons
- Release the reset button
- Wait until the LED flashes yellow (it will flash magenta first)
- Release the mode button
In DFU mode, type the command
1 | |
Once the update completes, your device will probably end up in listening mode (flashing blue). If not, use the buttons to change into listening mode. To get into listening mode, you will need to hold the mode button down for several seconds because it is the last flash pattern in the sequence.
Find your device id
You will need the device id later, so we will take advantage of being in listening mode to find it now. Type the command
1 | |
This will reveal your 24-character id and the curren version of the DeviceOS. Make a note of the id for later.
Connect to WiFi
In listening mode, type the command
1 | |
On your computer screen you will see the prompt
Should I scan for nearby Wi-Fi networks? (Y/n).
Press RETURN (Y is the default response) and after a few seconds, you will see a list of detected networks. Use the up and down arrow keys to find yours and then press RETURN.
The next prompt is Should I try to auto-detect the wireless security type? (Y/n).
Press RETURN and a new prompt should appear asking you for the password.
Enter the WiFi password and press RETURN and the device should attempt to
connect. To do this, it goes through several modes:
- Flashing green: searching for WiFi
- Flashing cyan: connecting to WiFi
- Fast flashing cyan: authenticating
- Breathing cyan: connected
Breathing is a slow fade-in/fade-out pattern
Claim your device
Claiming a device means associating it with an account on the Particle device cloud.
With your device connected to WiFi, type the command
1 | |
replacing <device_id> with the one you noted down earlier. You should see
a success message.
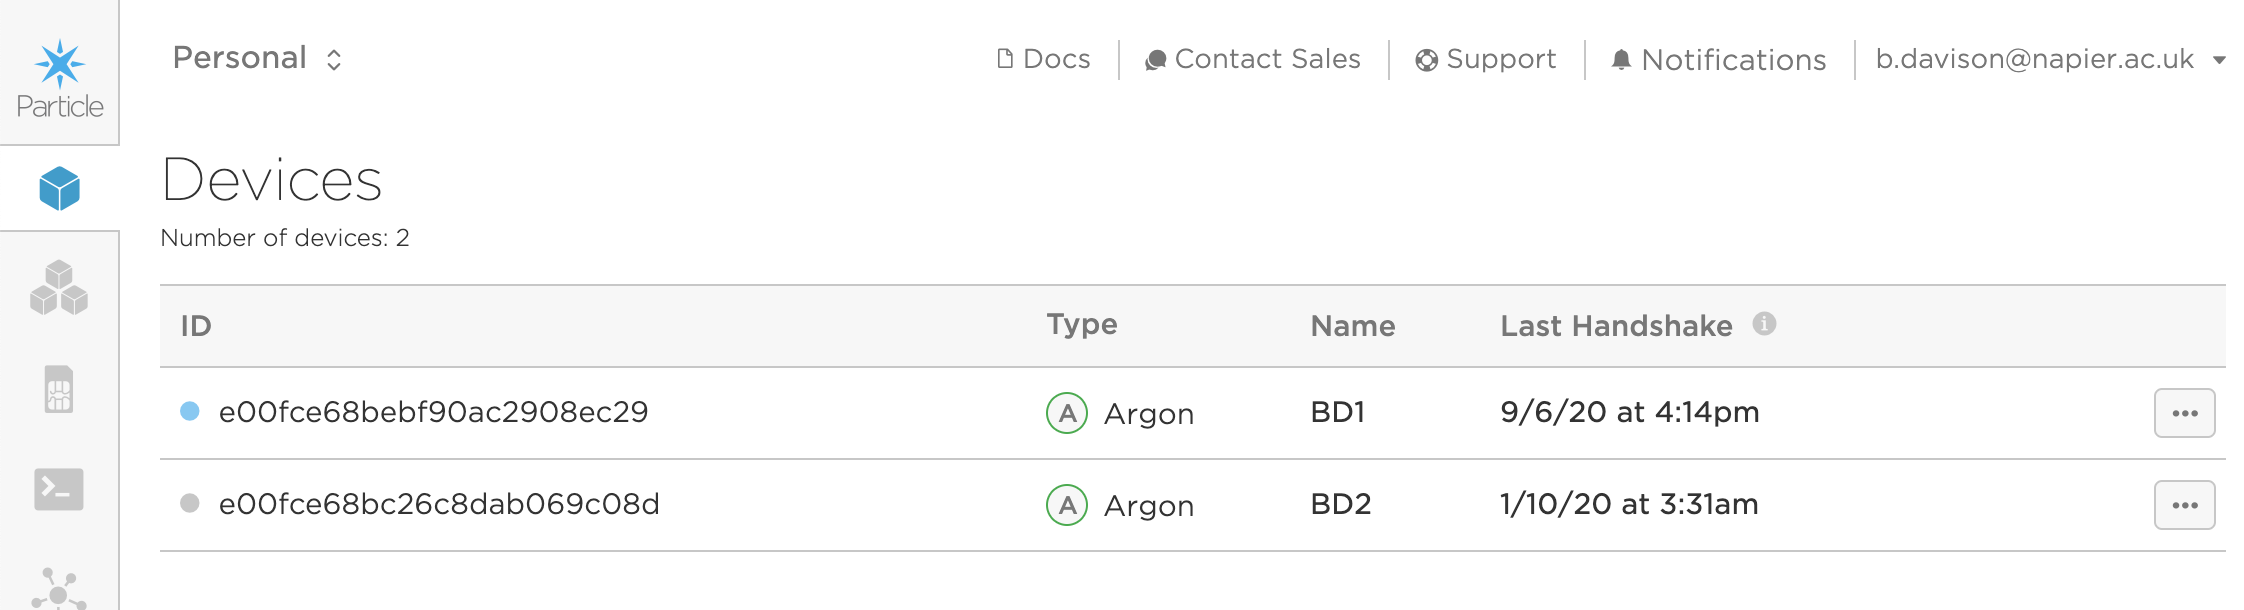
Once your device is claimed, you can go to the Particle console where you should see your device display as shown below. The device is identified by the id number that you noted down earlier. The coloured dot on the left should be breathing cyan to show that the device is online.
Running some code
Open the Web IDE using the icon on the left-hand side of the Particle console.
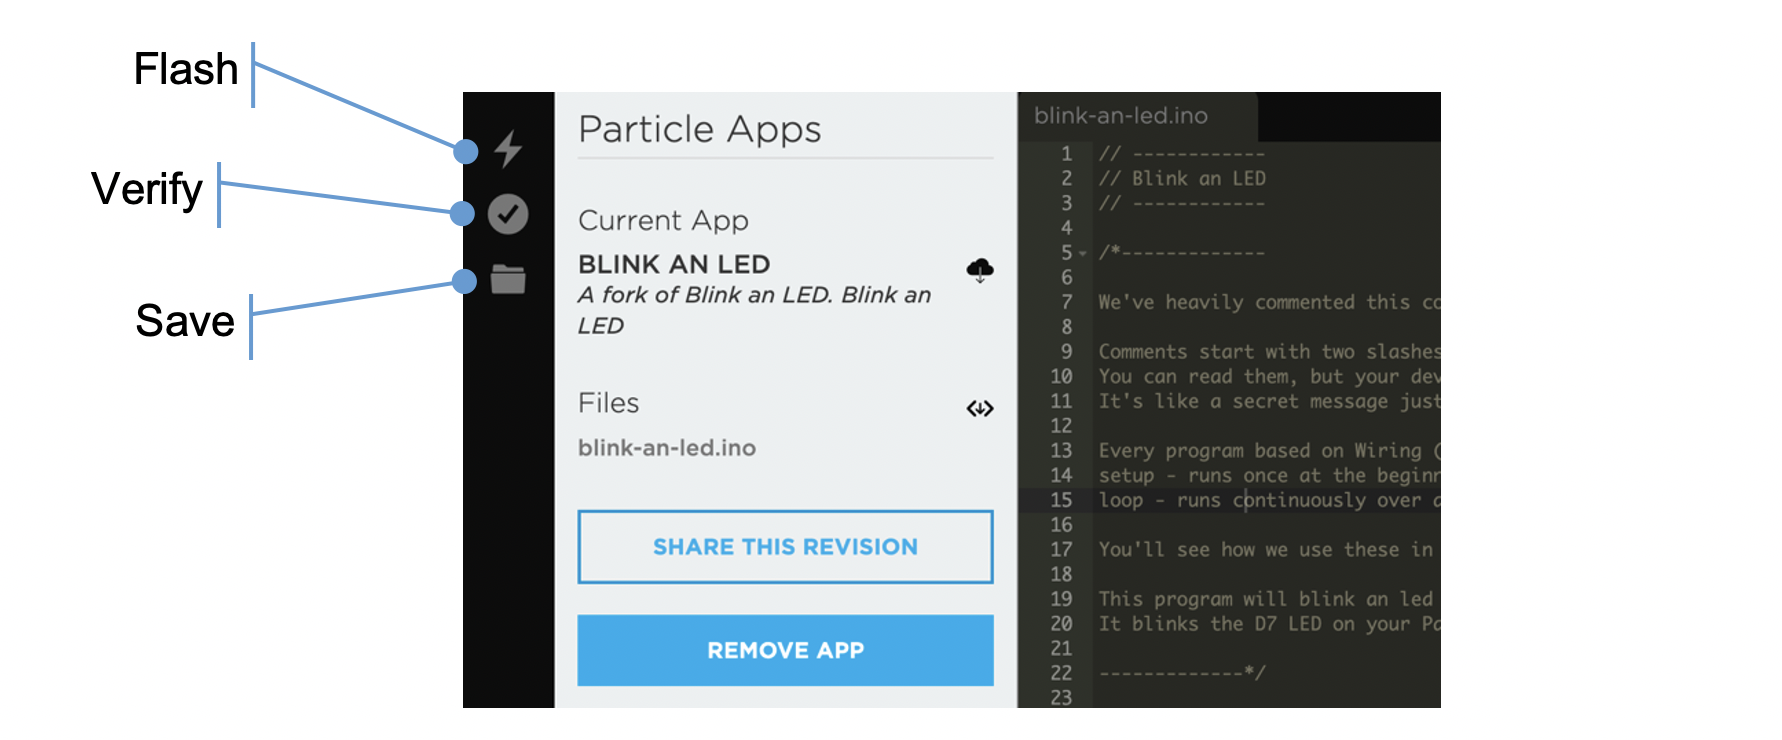
When it first opens, the Web IDE may look complicated but it quickly becomes familiar. For the time being, the important parts are shown below.

Click on the example called Blink an LED. The display changes so that the code is shown in the editor, and there are three icons revealed on the left.
Don't worry about the code for now...
The Flash option will load the code onto your device over the WiFi connection. There are a couple of additional steps after clicking the symbol, but they are easy to follow.
The blink app makes a small blue LED next to the USB connector flash slowly.
Now you are ready to go back and have a look at the blink code. It contains a lot of comments to explain how it works. If you are note used to working with microprocessors, you should also look at the code page in the microprocessors notes.
Example apps
In the Web IDE, there is a list of six example apps. By this stage, you should have loaded the first one, Blink an LED which causes an LED onboard the device to blink. The next task is to work through examples 2 - 5 (Tinker does not work on the Argon).
Example apps with external hardware
Now that you have some experience working with the board and the console, you can start to add some external hardware components. The Particle Web site provides some tutorial exercises for this.
If you have never set up circuits on a breadboard before, please spend some time with some introductory videos link the one in the links section below to find out how to do some basic things. Otherwise, work through the examples in the same way as before, and ignore the one called Tinker.
The Photon 2 datasheet will be a useful reference when you are using new features of the board. In particular, the pin-out diagram helps you to remember the functions of the different pins.

 Interpreting LED patterns
 Using a breadboard